
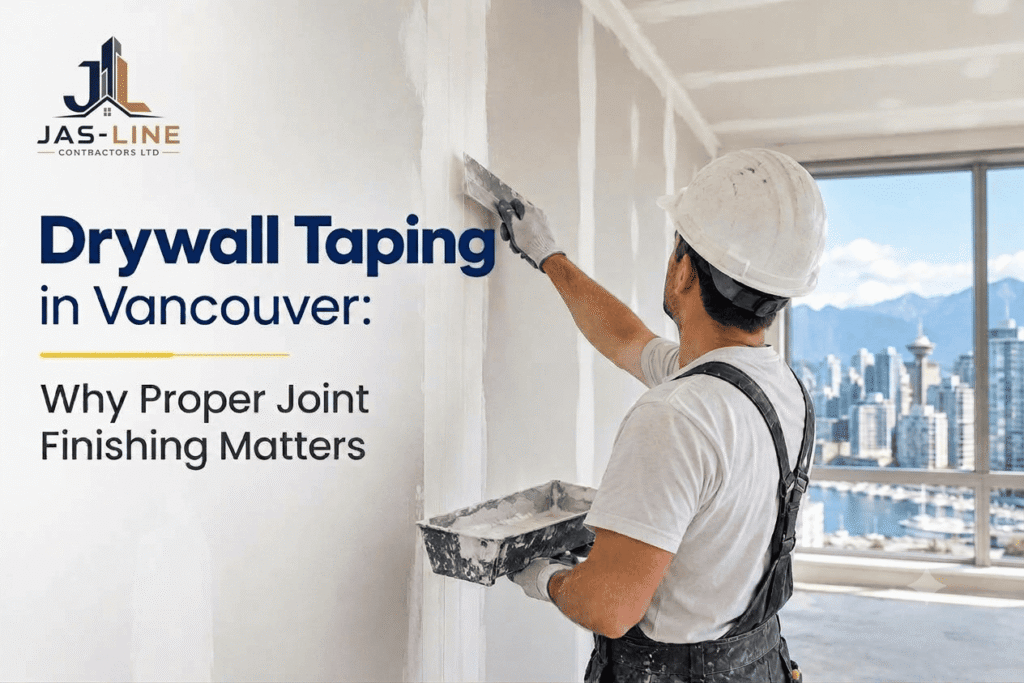
When drywall panels are installed, the walls and ceilings may look almost finished. However, the joints between the panels still need attention before the surface is ready for primer and paint. This is where drywall taping and joint finishing come in.
For homeowners, builders, property managers, and renovation contractors, drywall taping Vancouver BC projects require more than covering seams with tape and compound. The joints need to be prepared correctly, the tape must be embedded properly, and the compound must be applied in stages to create a consistent surface.
Poorly finished joints can show up as raised lines, shallow depressions, visible seams, or cracks after painting. These defects may become particularly noticeable on smooth walls and ceilings exposed to strong or angled lighting.
At Jas-Line Contractors Ltd., understanding the relationship between drywall installation, joint finishing, and the work that follows helps property owners make better decisions when planning interior construction or renovation projects in Vancouver, British Columbia.
What is Drywall Taping, and Why Does Proper Joint Finishing Matter?
Drywall taping is the process of reinforcing the joints between drywall panels with joint tape and compound. It is part of the wider finishing process, which also includes covering fastener heads, finishing inside corners, blending joints into the surrounding surface, and preparing the drywall for decoration.
The aim is to make the transitions between individual panels less noticeable once the wall or ceiling has been painted.
A typical drywall joint finishing Vancouver project involves several stages:
- Inspecting the drywall and preparing the joints.
- Applying joint compound and embedding the appropriate tape.
- Allowing the material to dry or set according to the product instructions.
- Applying additional coats of compound to build and widen the joint.
- Feathering the edges so the finished area blends into the surrounding board.
- Sanding carefully and checking for remaining imperfections.
- Preparing the completed surface for primer and paint.
The exact method depends on the drywall system, the condition of the panels, the products being used, and the finish required. A small repair, for example, may need a different approach from a large commercial interior with extensive wall and ceiling surfaces.
Proper finishing is not simply about hiding the tape. It is about creating a consistent surface that suits the intended use of the space.
Why Drywall Taping Matters for Vancouver Properties
The same basic finishing principles apply across British Columbia, but each project has its own requirements. In Vancouver, drywall taping may be part of a new residential build, a condominium renovation, a basement improvement, an office fit-out, or a commercial tenant improvement.
The condition of the existing structure, the design of the interior, and the finish specified for the project all influence the work required.
Creating a Consistent Wall and Ceiling Surface
Drywall joints create slight changes in the surface that need to be blended during finishing. If the compound is applied unevenly or the edges are not feathered far enough, the joints may remain visible after painting.
A professional drywall taping Vancouver service focuses on building up the joint gradually and blending it into the surrounding board. The aim is to avoid obvious ridges or depressions rather than simply applying enough material to cover the tape.
This is particularly relevant on long walls, open-plan interiors, and smooth ceilings, where even minor surface variations can be easier to see.
Preparing the Surface for Painting
Paint does not automatically conceal imperfections in drywall. Depending on the lighting, paint sheen, and surface preparation, it may make uneven joints or sanding marks more apparent.
Achieving paint ready drywall Vancouver property owners can confidently move forward with requires the surface to be checked before the painting stage begins. Any remaining ridges, pinholes, loose tape, or poorly blended areas should be addressed as appropriate.
The painter also needs to prepare the surface according to the coating manufacturer’s instructions. Drywall finishing and painting are separate stages, but the quality of the first directly affects the work required for the second.
Reducing the Risk of Joint Defects
Tape and joint compound work together to reinforce and finish the connections between drywall panels. Correct application helps reduce common finishing defects, including tape bubbles and visible seams.
However, even well-finished joints can crack if the underlying problem involves framing movement, building movement, moisture, impact, or other conditions. If a crack repeatedly returns, the cause should be investigated rather than covered with another layer of compound.
How the Drywall Mudding and Taping Process Works
Drywall mudding and taping Vancouver projects typically involve several applications of material, with appropriate drying or setting time between stages. Rushing the process can affect the quality of the finished surface.
1. Inspect and Prepare the Drywall
Before work begins, the installer or finisher checks the board edges, joints, fastener heads, and damaged areas. Gaps, loose material, torn drywall paper, and other defects may need attention before the joints can be finished.
Renovation work often requires additional preparation because the existing surface may contain old repairs, paint, damaged compound, or previous cracking.
The condition of the board should guide the preparation method. Applying fresh compound over a loose or damaged surface is unlikely to produce a durable, consistent finish.
2. Apply and Embed the Joint Tape
Joint tape is installed over the joint using a compatible joint compound or the specified system. The tape must be embedded properly, with sufficient contact beneath it to establish a sound bond.
If the tape is poorly embedded, air pockets or loose areas can develop. These may become visible during later finishing or after the surface has been painted.
Tape selection also matters. Paper tape and fibreglass mesh tape are not interchangeable in every application, so the appropriate material should be selected according to the joint, compound, and product instructions.
3. Apply Additional Coats of Compound
After the tape has been established, additional compound is applied to cover it and build a gradual transition between the joint and the surrounding drywall.
This is where technique becomes especially noticeable. A narrow, raised strip may remain visible if the compound is concentrated directly over the seam. Feathering the edges over a wider area helps reduce that raised appearance.
The number of coats and the width of the finished joint depend on the conditions and the required finish.
4. Allow Proper Drying or Setting Time
Joint compounds vary in how they harden. Some products dry through moisture evaporation, while setting-type compounds harden through a chemical reaction. Their application and recoat requirements differ.
The material should be allowed to dry or set as directed by its manufacturer before the next stage begins. Applying another coat too early can interfere with the finishing process, while sanding material that has not properly hardened can damage the surface.
5. Sand and Refine the Surface
Once the compound is ready, the finisher removes ridges and other surface imperfections. Sanding should be controlled and focused on refining the surface, not removing excessive material.
Over-sanding can expose the drywall tape, damage the paper face, or create low spots that require further repair. The goal is to produce an even transition while leaving the underlying board intact.
6. Inspect Before Painting
The finished drywall should be inspected before primer is applied. Looking across the surface from different angles can help reveal ridges, depressions, scratches, pinholes, or poorly blended repairs.
Where smooth finishes are specified, suitable lighting can help identify defects that are difficult to see under ordinary room lighting. Any additional preparation should be completed before the painting stage proceeds.
What Contributes to a Smooth Drywall Finish?
A smooth drywall finish Vancouver project depends on more than the final sanding stage. The quality of the result develops throughout the process.
Several factors deserve attention:
- Joint preparation: Damaged edges and unsuitable surfaces need to be addressed before taping.
- Tape selection: The tape must be appropriate for the joint and finishing system.
- Compound application: The material should cover the tape properly and build a gradual transition.
- Feathering: The edges should blend into the surrounding board without leaving noticeable ridges.
- Drying and setting: Each coat needs to be ready for the next stage.
- Controlled sanding: Surface imperfections should be removed without damaging the board or tape.
- Corners and fasteners: Inside corners, screw heads, and other transitions also need attention.
- Final inspection: The finish should be assessed against the appearance required for the project.
A small patch, a new residential interior, and a large commercial space will not necessarily need the same level of preparation. The intended paint finish, lighting conditions, and project specifications should be considered before the work starts.
Common Drywall Taping Problems and What Causes Them
Even when drywall is installed correctly, problems can develop if the joints are not prepared, taped, or finished properly.
Visible Drywall Seams
A visible seam often indicates that the joint has not been blended sufficiently into the surrounding surface. Inconsistent compound application, inadequate feathering, or poor sanding can leave a raised line or depression that becomes noticeable after painting.
The appropriate repair depends on the extent of the defect and the condition of the existing finish.
Bubbles Beneath the Tape
Tape bubbles may develop when the tape does not make proper contact with the compound underneath. They can also be associated with unsuitable application methods or surface conditions.
Simply applying more compound over a loose section may not resolve the problem. The affected area should be assessed and repaired using a suitable method.
Uneven or Raised Joint Compound
Too much compound concentrated over a narrow joint can leave a ridge, while insufficient material can leave the tape inadequately covered or the joint poorly filled.
Building the joint in stages and feathering the edges helps produce a more gradual transition.
Cracks Along Drywall Joints
Cracks may result from movement, framing conditions, moisture, impact, or problems with the original joint treatment. The location, pattern, and recurrence of the crack can help determine what needs further investigation.
Where movement or moisture is suspected, the underlying issue should be addressed before the surface is refinished.
Damage from Excessive Sanding
Aggressive sanding can expose tape, tear the drywall paper, or leave low spots. These defects may require additional compound and another round of careful finishing.
Controlled sanding and inspection throughout the process are generally more effective than trying to correct every imperfection at the very end.
Drywall Taping for Renovations and Repairs
Finishing newly installed drywall is often more straightforward than blending a repair into an existing painted wall. Older surfaces can contain several layers of compound and paint, previous patches, damaged paper, or uneven transitions between old and new boards.
Before choosing a repair method, the existing surface should be assessed.
For a small, isolated defect, a localised repair may be sufficient. Where the surrounding surface is uneven or the damage extends beyond the original joint, a wider finishing area may create a better visual transition.
Repeated cracks deserve particular attention. If the same area continues to crack after repairs, it may be necessary to investigate movement, moisture, or another underlying cause before applying more compound.
The objective is to select a repair method that suits the actual condition of the wall, rather than treating every defect as a simple cosmetic issue.
Why Lighting Affects Drywall Joint Finishing
A wall may look smooth when viewed directly from the front but reveal imperfections when light falls across it at a shallow angle. This is commonly referred to as critical or raking light.
It can be a consideration in spaces with:
- Large, uninterrupted walls.
- Smooth ceilings.
- Large windows that cast light across a surface.
- Recessed or wall-washing light fixtures.
- Minimal wall texture.
- Decorative finishes that highlight surface variations.
Good drywall seams finishing Vancouver work should take the intended appearance of the room into account. Where the design includes strong directional lighting, the required finish and inspection approach should be discussed before the work begins.
Lighting can reveal small variations even in carefully finished drywall. The required finish should therefore be agreed upon in advance, particularly where appearance is a major part of the design.
Residential and Commercial Drywall Taping Considerations
The underlying taping principles are similar in residential and commercial construction, but project conditions and coordination requirements can differ.
Residential Projects
Homes and condominiums may include bedrooms, living areas, stairwells, basements, and ceilings with different lighting conditions. Homeowners may also be combining new drywall with existing walls during a renovation.
The desired paint finish, the visibility of joints, and the condition of the existing surface should all be considered when planning the work.
Commercial Projects
Offices, retail units, and other commercial interiors may have extensive wall and ceiling areas, multiple trades working in sequence, and specific project finish requirements.
Scheduling matters because the drywall surface must be ready before painting, while framing, insulation, and any required concealed work should be completed at the appropriate stage. Access, work areas, and coordination with other trades may also affect the finishing schedule.
For both residential and commercial work, the project specifications should determine the expected finish rather than relying on a general assumption that every wall needs the same level of treatment.
How to Choose a Drywall Finishing Contractor in Vancouver
When comparing contractors, look beyond the quoted scope of work and consider how the finishing requirements will be handled.
Here are a few practical questions to ask:
1. Is the expected finish clearly defined?
Discuss whether the project requires a standard painted surface, a smooth ceiling, or a finish that will be viewed under strong directional lighting. Clear expectations can help avoid disagreements later.
2. How will existing damage be handled?
If the project involves renovation work, ask how damaged drywall, old repairs, loose tape, or recurring cracks will be assessed before finishing begins.
3. What materials and methods will be used?
The tape and compound should be suitable for the application and compatible with the manufacturer’s instructions. Ask how corners, fastener heads, and other transitions will be treated.
4. How will the surface be inspected?
A suitable inspection should look for visible ridges, depressions, tape defects, sanding marks, and other imperfections relevant to the specified finish.
5. How will the work be coordinated with painting and other trades?
Confirm what is included in the drywall finishing scope and whether priming, painting, repairs, or other work is being handled separately. Agreeing on responsibilities and timing helps the project move forward with fewer misunderstandings.
A suitable drywall finishing contractor Vancouver property owners can work with should be able to explain the proposed process, identify limitations in the existing surface, and clarify what the finished work is expected to achieve.
Planning a renovation or interior construction project? Speak with Jas-Line Contractors Ltd. about the work required and how the finishing stage fits into your project.
How Drywall Taping Fits into the Wider Construction Process
Drywall finishing is one part of a larger sequence of interior construction work. Depending on the project, it may follow steel stud framing, insulation, vapour barrier installation where required, and the completion and inspection of concealed services.
Once the drywall has been installed and finished, the surface can move on to the preparation and painting stages.
The order matters. Work that needs to be completed behind the drywall should be addressed before the boards are closed in, and the finished surface should be ready before painting starts.
For projects that involve several trades, Jas-Line Contractors Ltd. offers related services that may form part of the wider scope. Where appropriate, add internal links to the relevant service pages using the following anchor text:
- Steel stud framing services
- Insulation and vapour barrier services
- Painting services
- Drywall installation services
Link each phrase to its matching service page on the Jas-Line Contractors Ltd. website after confirming the correct destination URL. Only include services relevant to the project being discussed.
Preparing for a Drywall Taping Project
A little planning before work starts can help clarify the finish, schedule, and responsibilities.
Decide on the intended appearance. A standard painted wall, a smooth ceiling, and a surface exposed to strong directional lighting may have different finishing requirements.
Check the existing drywall. For renovation projects, identify visible cracks, previous patches, damaged paper, and areas where the old and new surfaces meet.
Consider the lighting. Discuss any areas where light may travel across the wall or ceiling and make surface variations more noticeable.
Coordinate the next stage. Confirm when the drywall will be ready for primer and painting, allowing for the compound’s required drying or setting time.
Clarify the scope of work. Confirm whether the quotation covers taping, additional coats, sanding, repairs, final inspection, and any separate painting or priming work.
These discussions help set realistic expectations and give the finishing work a clear target.
Conclusion: Getting Better Results from Drywall Taping in Vancouver BC
Drywall joints may disappear beneath primer and paint, but the quality of the finished wall or ceiling depends heavily on how those joints are treated. Careful preparation, proper tape embedding, controlled compound application, consistent feathering, and thorough inspection all contribute to the final appearance.
For property owners planning drywall taping Vancouver BC projects, the best approach is to consider the condition of the surface, the intended paint finish, the lighting, and the work that needs to happen before and after drywall finishing.
Whether the project involves a new interior, a renovation, or a localised repair, clearly defined finish requirements and sensible trade coordination can help reduce avoidable rework and create a better surface for painting.
Jas-Line Contractors Ltd. works across construction-related scopes in Vancouver, British Columbia. Contact the team to discuss your project requirements and determine which services are appropriate for the work.
📞 Call us or Contact Us today.
Frequently Asked Questions
1. What is drywall taping?
Drywall taping involves applying joint tape and compound over the joints between drywall panels. The process continues with additional compound, feathering, sanding, and inspection to prepare the surface for its intended finish.
2. How long does drywall taping take?
The timeframe depends on the size of the area, the number and condition of the joints, the compound being used, the required drying or setting time, and the finish specified. A small repair may take considerably less time than a multi-room project. The schedule should allow sufficient time for each stage.
3. Is drywall taping necessary before painting?
Yes. For a typical painted drywall surface, joints and fastener areas need to be finished, and the surface needs to be prepared before primer and paint are applied. Paint alone will not properly conceal unfinished joints.
4. What is the difference between drywall taping and drywall finishing?
Taping involves embedding joint tape over drywall seams. Finishing is the broader process that includes covering the tape, applying additional compound, feathering the edges, sanding, and preparing the surface for decoration.
5. Can drywall seams crack after taping?
Yes. Proper taping helps reinforce the joints, but cracking can still occur because of movement, framing conditions, moisture, impact, or other underlying problems. Recurring cracks should be investigated before the area is repaired again.
6. What affects the quality of a smooth drywall finish?
Joint preparation, tape and compound selection, application technique, drying or setting time, sanding, lighting, and the required finish all affect the result. The condition of the existing drywall also matters, particularly during renovation work.