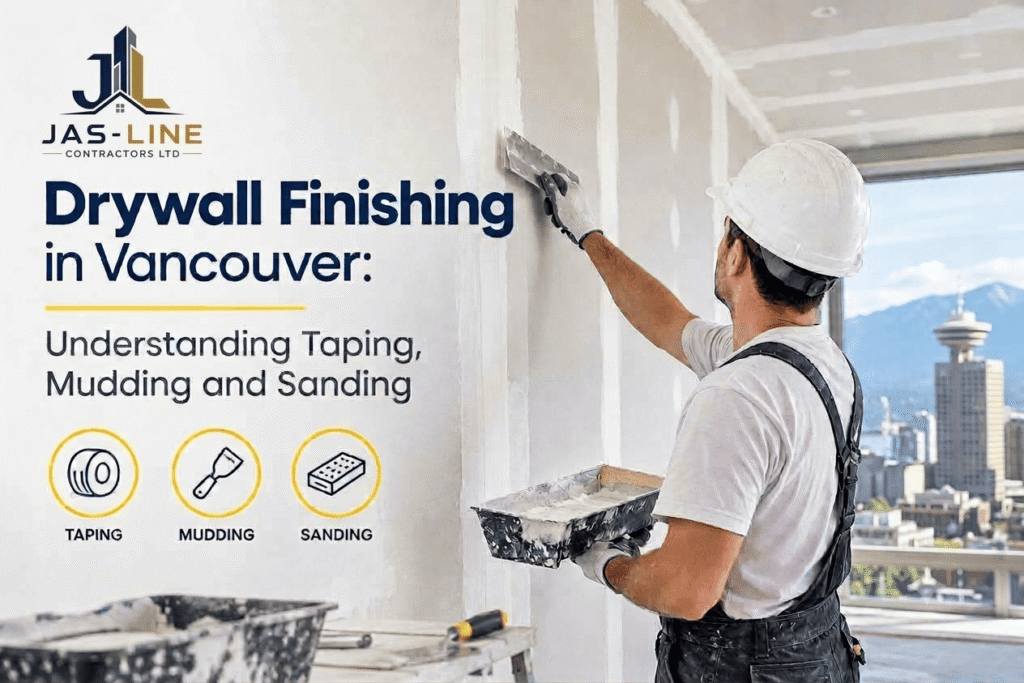
Drywall installation is only part of the process when creating clean, finished walls and ceilings. Once the boards are in place, the joints, screw holes and corners need to be finished properly before the surface is ready for primer and paint. This stage is known as drywall finishing, and the quality of the work can have a noticeable effect on how the completed space looks.
For homeowners, builders and property managers looking for drywall finishing in Vancouver, it helps to understand what the process involves and why each stage matters. Taping, mudding and sanding may seem straightforward, but each requires care, the right materials and enough time for the work to be completed properly.
Jas-Line Contractors Ltd. works in the construction sector in Vancouver, British Columbia, where interior projects can range from home renovations to commercial fit-outs. Understanding the finishing process can help property owners plan their projects, communicate with contractors and make informed decisions about the final result.
What is Drywall Finishing?
Drywall finishing is the process of treating the joints between drywall panels, covering fastener heads and smoothing the surrounding surface. When drywall sheets are installed, their edges and fixing points remain visible. These areas need to be filled and blended so they do not stand out once the walls or ceilings are painted.
The process generally involves three main stages:
- Drywall taping: Joint tape is embedded in compound to reinforce the seams between panels.
- Drywall mudding: Joint compound is applied over the tape, fasteners and other imperfections to create a more even surface.
- Drywall sanding: Once the compound has dried, the surface is refined to remove ridges and minor irregularities.
The amount of work required depends on the condition of the drywall and the finish specified for the project. A wall that will receive a textured finish may need different preparation from one that will be painted with a smooth, high-gloss coating.
Good results also depend on the work completed before finishing begins. Drywall should be installed and fastened correctly, and any underlying issues should be addressed before the joints are covered.
If your project involves new drywall as well as finishing, drywall installation services can be linked here to the relevant Jas-Line Contractors Ltd. service page.
1. Drywall Taping: Getting the Joints Right
Drywall panels are installed in sections, leaving joints wherever two edges meet. If these seams are not treated correctly, they can remain visible after painting or develop cracks over time.
Drywall taping in Vancouver involves embedding joint tape into joint compound along the seams between panels. The tape reinforces the joint, while the compound provides a base for the additional coats needed to create a consistent surface.
How does drywall taping work?
The process usually starts with an inspection of the joints. The installer checks that the drywall edges are properly supported and that the boards are securely fastened.
Joint compound is then applied along the seam, and the tape is positioned and pressed into the compound. Excess material is removed to limit ridges and uneven areas. The compound must dry according to the product instructions before the next coat is applied.
Paper tape is commonly used for flat joints and inside corners. Certain mesh tapes are also suitable for specific applications, depending on the compound and the manufacturer’s recommendations.
The choice of tape matters, but careful application matters just as much. Loose tape, trapped air or an uneven layer of compound can create defects that become more difficult to correct during later stages.
Taking time to prepare the joints properly gives the remaining finishing work a better foundation.
2. Drywall Mudding: Building an Even Surface
Once the tape has been embedded, the next step is applying additional joint compound, commonly called drywall mud. Drywall mudding in Vancouver helps cover the tape and fastener heads while blending the joints into the surrounding wall or ceiling.
The goal is to make the transitions less noticeable, not simply to cover them with a thick layer of compound. Each application should be spread and feathered outward so the finished joint does not leave a visible ridge.
Why are multiple coats of drywall mud needed?
Drywall finishing generally involves more than one coat because each layer helps refine the surface.
- First coat: Embeds the tape and establishes the joint.
- Additional coats: Build coverage, fill shallow depressions and blend the joint into the surrounding surface.
- Final coat: Refines the area before sanding and inspection.
The number of coats depends on the condition of the joints, the compound being used and the required finish level. Some areas may need additional attention if the original surface is uneven.
Drying time also varies. Temperature, humidity, ventilation and the thickness of the compound can all affect how quickly it is ready for the next stage. Some compounds dry through evaporation, while setting-type products harden through a chemical reaction. Following the manufacturer’s instructions helps avoid problems caused by working too soon.
Applying another coat before the previous layer is ready can affect the finish. Applying too much compound at once can also create unnecessary ridges and increase the amount of sanding required later.
Finishing corners and screw heads
Corners and fastener locations need the same attention as the main joints.
Outside corners often use corner bead or another suitable reinforcement to create a defined edge. Compound is applied around the reinforcement and feathered into the adjoining surfaces.
Screw heads must also be covered and blended. If they are left raised or the surrounding compound is not applied properly, small bumps or depressions may become noticeable after painting.
These details can be easy to overlook during construction, but they often stand out once the walls receive their final coating.
3. Drywall Sanding: Preparing for the Final Finish
After the joint compound has dried sufficiently, sanding helps remove tool marks, ridges and minor surface imperfections. Drywall sanding in Vancouver is an important part of preparing walls and ceilings for primer and paint, particularly when a smooth finish is expected.
The objective is to refine the surface without removing too much compound. Excessive sanding can expose the joint tape, damage the paper face of the drywall or create shallow depressions that need to be filled again.
What happens during drywall sanding?
The process typically includes:
- Inspecting the dried compound for ridges, scratches and uneven transitions.
- Selecting suitable sanding tools and abrasives for the surface.
- Smoothing the edges of each joint without damaging the surrounding drywall.
- Applying more compound where deeper imperfections remain.
- Removing sanding dust before the surface is primed.
Sanding is not always a matter of working over every area repeatedly. Careful inspection helps identify where attention is needed and reduces unnecessary work.
Dust management is another consideration. Sanding drywall produces fine particles that can spread beyond the immediate work area. Appropriate respiratory protection, containment and cleanup methods should be selected for the conditions on site.
In occupied homes, condominiums and commercial buildings, it is also worth considering how nearby flooring, furniture, finished surfaces, ventilation openings and equipment will be protected.
A clean, properly prepared surface gives the painter a better starting point.
4. Understanding Drywall Finish Levels
Not every wall or ceiling needs the same level of finishing. The appropriate finish depends on the intended wall covering, the lighting conditions and the requirements set out in the project specifications.
Drywall finish levels are commonly described from Level 0 through Level 5.
| Finish level | Typical application |
|---|---|
| Level 0 | Drywall is installed but left unfinished. |
| Level 1 | Joint tape is embedded in compound, generally for concealed areas where specified. |
| Level 2 | Tape is embedded and covered with a coat of compound; used for certain specified applications, including some areas receiving tile. |
| Level 3 | Additional compound is applied, often for surfaces receiving heavier textures or finishes that do not require a smooth painted appearance. |
| Level 4 | Commonly specified for many smooth-wall applications using flat paint or light textures. |
| Level 5 | Includes a Level 4-type finish with a thin skim coat over the entire surface to improve uniformity. |
These descriptions are general guidance. The required finish should be confirmed against the applicable industry standard, construction documents and intended final coating.
When should you consider a Level 5 drywall finish?
A Level 5 drywall finish may be worth considering where lighting or decorative coatings are likely to reveal small surface variations. Examples include areas with strong angled lighting, high-gloss paint or demanding wall finishes.
The skim coat helps create a more uniform surface, but it does not guarantee that every wall will appear perfectly flat under every lighting condition.
For many residential interiors, a properly completed Level 4 finish may be suitable. The decision should be made before work begins so the scope, labour and schedule can be planned accordingly.
If you are unsure which finish level your project needs, discuss the intended paint or wall covering with the contractor before finishing starts.
5. Preparing Drywall Before Painting
Even well-finished drywall needs a final inspection before paint is applied. Dust, scratches, pinholes and uneven patches can affect the appearance of the finished wall.
Before painting, the surface should be checked under suitable lighting. Any remaining defects should be corrected, and sanding dust should be removed using an appropriate cleaning method.
Drywall primer is generally used to prepare unfinished drywall paper and joint compound for painting. These materials absorb coatings differently from many painted surfaces, so the right primer helps create a more consistent base for the finish coat.
Primer selection should suit the substrate and the coating system. Following the paint manufacturer’s preparation instructions is a sensible way to avoid compatibility issues.
Where finishing and painting are part of the same project, painting services can be linked to the relevant Jas-Line Contractors Ltd. service page.
Planning these stages together helps clarify when the drywall is ready for painting and who is responsible for the final surface inspection.
6. Common Drywall Finishing Problems to Watch For
Small defects can become more obvious once primer and paint are applied. Checking the surface throughout the finishing process can help identify problems before they affect the final result.
Visible seams after painting
If drywall joints remain visible, the compound may not have been feathered sufficiently, the finish level may not suit the lighting conditions, or the surface may not have been inspected carefully before painting.
The best correction depends on the cause. Simply applying more paint will not necessarily hide an uneven joint.
Cracks along drywall joints
Cracks can develop for several reasons, including movement, inadequate joint preparation or insufficient support. Problems with the surrounding assembly may also contribute.
Before repairing a crack, it is worth identifying why it appeared. Reapplying compound without addressing the underlying issue may only provide a temporary fix.
Raised or visible screw heads
Fasteners that protrude or become visible through the finished surface can leave small bumps or marks. The affected area should be checked and repaired using an appropriate method before the final coating is applied.
Scratches and sanding marks
Uneven sanding can leave scratches, ridges or shallow depressions. These may become easier to see after primer or paint changes the appearance of the surface.
Additional compound and careful sanding may be needed to correct the affected area.
Dust left behind after sanding
Fine dust left on the drywall can interfere with surface preparation and coating application. The wall or ceiling should be cleaned before primer is applied, following the coating manufacturer’s recommendations.
Inspecting the work between coats is generally easier than discovering defects after the painting stage is complete.
7. Residential and Commercial Drywall Finishing in Vancouver
The basic finishing process is similar in many types of buildings, but the project requirements can vary depending on the size of the space, the existing construction and the work being carried out.
Residential drywall finishing
Homes, apartments and basement renovations may involve new partitions, ceiling repairs, extensions or transitions between existing and new drywall.
Before finishing begins, the existing surface should be checked for loose material, cracks, moisture damage and uneven joints. Older walls may need repair work before they are ready for new compound or paint.
Homeowners should also consider how the finished rooms will be lit and decorated. These decisions can influence the finish level and the amount of surface preparation required.
Commercial drywall finishing
Offices, retail units and other commercial interiors may involve larger wall areas, multiple trades and specific finishing requirements. The work also needs to fit within the wider construction schedule.
Coordination with electricians, plumbers, mechanical contractors and painters helps reduce the risk of finished surfaces being damaged or reopened after completion.
Where the project includes insulation or wall assemblies, insulation and vapour barrier services may be relevant before the drywall is installed. The appropriate materials and installation details depend on the assembly design and applicable requirements.
For new interior partitions, steel stud framing services may also be needed before drywall installation and finishing can begin.
Fire-rated walls and ceilings require additional care. Finishing work must follow the specified assembly requirements and must not compromise the intended fire-resistance performance. Where penetrations or joints require firestop systems, suitable tested systems and project specifications should be followed. Relevant projects may also require coordination with firestopping services.
These related services should be linked to the corresponding Jas-Line Contractors Ltd. pages where they are relevant to the work being discussed.
8. How to Plan a Drywall Finishing Project
A little planning before the work begins can make it easier to manage expectations, coordinate trades and avoid unnecessary delays.
Confirm the scope of work. Clarify whether the project includes drywall installation, repairs, taping, mudding, sanding, skim coating, priming or painting. Different contractors may include different tasks in their proposals.
Agree on the finish level. Discuss the intended wall covering and lighting conditions before work starts. This helps establish what level of surface preparation is required.
Check that the site is ready. Confirm that the drywall is properly installed, the work area is accessible and other trades have completed tasks that could damage the finished surfaces.
Allow enough drying time. The schedule should account for the compound being used and the actual site conditions. Rushing the process to meet a target date can affect the quality of the finish.
Plan for dust control. Consider how adjoining rooms, flooring, furniture, fixtures and ventilation openings will be protected during sanding and cleanup.
Inspect before painting. Review the joints, corners, fastener locations and overall surface under suitable lighting. Complete any necessary repairs before the final coating stage.
These practical steps help homeowners, builders and property managers understand what to expect and give each trade a clearer idea of when the next stage can begin.
Choosing Drywall Finishing Services in Vancouver
When comparing drywall finishing contractors in Vancouver, it is worth looking beyond photographs of completed walls. Ask how the surface will be prepared, which finish level is included, how dust will be managed and whether repairs or additional coats are covered by the agreed scope.
It is also useful to clarify whether priming and painting are included, who will protect completed surfaces and how the work will be coordinated with other trades. Having these details in writing makes it easier to compare proposals and reduces the chance of misunderstandings.
Jas-Line Contractors Ltd. serves construction project needs in Vancouver, British Columbia. For a project involving drywall finishing or related interior work, discuss the site conditions, required finish and overall scope before deciding on the appropriate approach.
Planning a drywall finishing project in Vancouver? Visit the Jas-Line Contractors Ltd. website to discuss your project requirements and the next steps for your interior construction work.
Frequently Asked Questions
1. What is the difference between drywall taping, mudding and sanding?
Taping reinforces the joints between drywall panels. Mudding involves applying joint compound over the tape, fastener heads and surface transitions. Sanding refines the dried compound to reduce ridges and minor imperfections before primer or paint is applied.
2. How long does drywall finishing take?
The timeline depends on the size of the area, the number of coats required, the compound being used and the drying conditions. Larger projects or those requiring a higher finish level may take longer. Each coat needs sufficient time to dry or set before the next stage begins.
3. Which drywall finish level is best for a home?
Level 4 is commonly suitable for many painted residential walls and ceilings. Level 5 may be appropriate where critical lighting, high-gloss paint or a more uniform surface is required. The right choice depends on the project specifications and intended finish.
4. Does drywall need to be sanded before painting?
Most conventionally taped and mudded drywall needs some form of surface refinement and inspection before painting. Sanding is commonly used to remove ridges and minor imperfections. The surface must also be cleaned properly before primer is applied.
5. Can drywall finishing repair cracks and wall damage?
Joint compound can correct minor surface imperfections, but it cannot resolve every crack or damaged area. Recurring cracks, moisture damage, loose drywall or signs of movement should be assessed before refinishing. The underlying cause may need to be addressed first.
6. Should drywall be primed after sanding?
Yes. Unfinished drywall generally needs a suitable drywall primer before painting. Primer helps create a more consistent base across the drywall paper and joint compound. The product should be selected according to the surface and the paint manufacturer’s recommendations.
7. What should I ask a drywall finishing contractor before hiring?
Ask which finish level is included, how many coats are anticipated, what surface preparation is covered and how dust and cleanup will be handled. You should also confirm whether repairs, priming and painting are included, along with any exclusions, before approving the work.