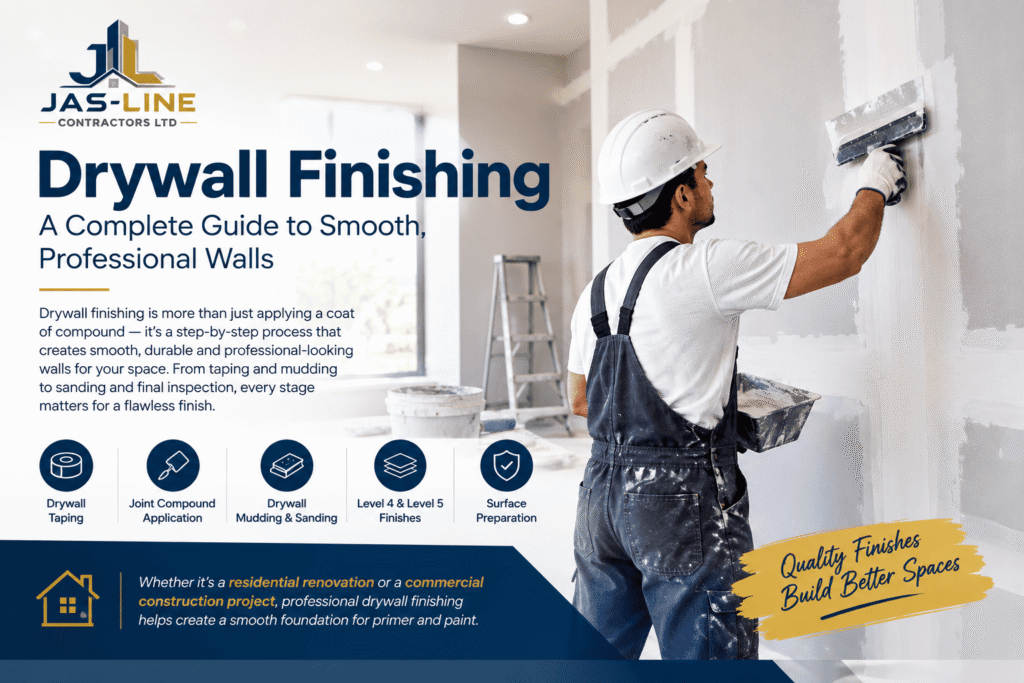
A smooth, professional wall finish can make a major difference in the appearance of any residential or commercial space. While installing drywall panels is an important part of construction, the final appearance depends heavily on proper drywall finishing.
Professional finishing involves taping joints, applying joint compound, covering fasteners, feathering the edges, sanding, and preparing the surface for primer and paint. The required finish level depends on the location, lighting, wall covering, and type of paint being used.
In this guide, we explain the drywall finishing process, common finish levels, and why professional workmanship matters for achieving clean, consistent walls.
What Is Drywall Finishing?
Drywall finishing is the process of preparing installed drywall panels for painting, texturing, or other decorative finishes.
The process generally includes:
- Applying drywall tape to joints
- Applying drywall mud or joint compound
- Covering screws and fasteners
- Feathering compound across joints
- Sanding the surface
- Correcting imperfections
- Preparing the wall for primer and paint
The goal is to create a smooth and uniform surface where joints, screw heads, and other imperfections are no longer noticeable.
Why Is Professional Drywall Finishing Important?
Proper drywall finishing does more than make walls look attractive. It creates a consistent surface that is ready for the next stage of the project.
Poor finishing can result in:
- Visible drywall seams
- Uneven surfaces
- Nail or screw pops
- Cracks around joints
- Sanding marks
- Visible ridges
- Joint flashing after painting
Professional drywall contractors understand how to control compound thickness, feather edges, sand properly, and prepare surfaces according to the required finish level.
The Drywall Finishing Process
A professional drywall finishing service normally follows several important steps.
1. Drywall Inspection and Preparation
Before finishing begins, the installed drywall should be inspected for damaged panels, gaps, protruding fasteners, and other issues.
Any problems should be corrected before applying joint compound.
Proper preparation helps create a better foundation for the finishing process.
2. Drywall Taping
Drywall taping is used to reinforce and conceal the joints between drywall panels.
Tape is embedded into joint compound along the seams and inside corners. The compound is then smoothed to create a gradual transition between the drywall panels.
Good taping is essential because poorly finished joints can remain visible after painting.
3. Applying Joint Compound
Joint compound, commonly called drywall mud, is applied over taped joints, screw heads, corner areas, and other imperfections.
Multiple coats may be required depending on the specified finish level.
Each coat should be applied carefully and allowed to dry appropriately before the next stage.
4. Feathering the Edges
Feathering means gradually spreading the compound away from the joint so there is no sharp edge or visible buildup.
This step is particularly important for achieving a seamless appearance after painting.
5. Sanding the Drywall
After the compound has dried, drywall sanding is performed to remove ridges, tool marks, and uneven areas.
The goal is not simply to remove as much material as possible. Excessive sanding can damage the drywall paper and create additional surface problems.
Careful sanding produces a cleaner surface while minimizing imperfections.
6. Final Inspection
Before primer or paint is applied, the finished surface should be inspected under appropriate lighting.
Small imperfections that are difficult to see under normal lighting can become more noticeable under strong or directional lighting.
This is especially important when a high-quality or smooth wall finish is required.
Understanding Drywall Finish Levels
Different projects require different levels of drywall finishing. The appropriate level depends on how the space will be used and how the finished surface will be decorated.
Level 1 Drywall Finish
Level 1 is a basic finish generally used in areas where the drywall surface will not be visible or where appearance is not a major concern.
It typically involves embedding tape into the joint compound without extensive finishing.
Level 2 Drywall Finish
Level 2 provides additional coverage over joints, fasteners, and accessories.
It may be suitable for areas such as garages, service areas, or spaces that will receive tile or other coverings.
Level 3 Drywall Finish
A Level 3 finish provides a smoother surface and can be appropriate for areas receiving heavier textures or certain wall coverings.
Additional compound is applied over joints and fasteners to create a more consistent surface.
Level 4 Drywall Finish
Level 4 drywall finish is commonly used for standard interior walls and ceilings where a smooth appearance is required.
It involves additional coats of joint compound over joints and fasteners, followed by sanding and surface preparation.
For many typical residential and commercial interiors, Level 4 provides an appropriate surface for suitable paint and decorative finishes.
Level 5 Drywall Finish
Level 5 drywall finish provides the highest level of surface uniformity.
A thin skim coat is applied across the entire surface after the underlying finishing work has been completed. This helps reduce differences in texture and porosity between the drywall paper and finished joints.
Level 5 drywall is particularly useful in areas with critical lighting or where dark, glossy, or non-flat paint finishes may make surface imperfections more noticeable.
Level 4 vs. Level 5 Drywall Finish
One of the most common questions when planning a finishing project is the difference between Level 4 and Level 5.
A Level 4 drywall finish provides a smooth finished surface for many standard applications.
A Level 5 drywall finish goes a step further by applying a thin skim coat across the entire surface to create greater uniformity.
The choice depends on:
- Lighting conditions
- Paint sheen
- Wall design
- Desired appearance
- Project specifications
- Visibility of the finished surface
For example, strong directional lighting can make minor variations more visible, making a Level 5 finish a better choice for certain high-visibility spaces.
Residential Drywall Finishing
Residential drywall finishing is commonly used in:
- New homes
- Bedrooms
- Living rooms
- Kitchens
- Basements
- Home additions
- Renovation projects
- Ceilings and interior walls
Homeowners often want smooth walls that provide a clean foundation for paint and interior design.
A professional finish can help create a more polished appearance throughout the home.
Commercial Drywall Finishing
Commercial drywall finishing is used in many types of buildings, including:
- Office buildings
- Retail spaces
- Restaurants
- Healthcare facilities
- Educational buildings
- Multi-unit residential properties
- Hospitality projects
- Commercial renovations
Commercial projects can involve larger wall areas, multiple trades, strict schedules, and specific finish requirements.
Experienced commercial drywall contractors can coordinate finishing work with other trades and project specifications to help maintain quality and efficiency.
Common Drywall Finishing Problems
Even small finishing mistakes can become noticeable after painting.
Common problems include:
Visible Joints
If joints are not properly feathered and sanded, they may remain visible under certain lighting conditions.
Uneven Compound
Applying too much or too little compound can create bumps, depressions, or uneven transitions.
Screw Pops
Fasteners that are not properly secured or finished can become visible through the final paint.
Cracks
Movement, improper installation, or insufficient joint treatment can contribute to cracking around seams and corners.
Over-Sanding
Excessive sanding can damage the drywall paper and make the surface more difficult to finish properly.
Joint Flashing
Differences between the drywall surface and finished joints can sometimes become visible after painting, particularly with certain lighting and paint finishes.
How to Choose the Right Drywall Finish
The correct finish level should be selected based on the final appearance you want to achieve.
Consider:
- Where the drywall will be installed
- How much natural or artificial lighting the area receives
- Whether the walls will be painted or textured
- Paint colour and sheen
- Whether the space is residential or commercial
- Project specifications and requirements
For standard interiors, Level 4 may be appropriate. For areas requiring a highly uniform appearance, Level 5 drywall finishing may be a better choice.
Why Hire Professional Drywall Contractors?
Professional drywall contractors bring experience and specialized techniques to every stage of the finishing process.
A professional team can help with:
- Drywall taping
- Joint compound application
- Drywall mudding
- Sanding
- Corner finishing
- Level 4 finishing
- Level 5 finishing
- Surface preparation
- Repairing finishing imperfections
Professional workmanship can help reduce visible defects and provide a cleaner surface for primer and paint.
Final Thoughts
Quality drywall finishing is essential for achieving smooth, attractive, and professional-looking walls.
From drywall taping and joint compound application to sanding and final inspection, every stage contributes to the final appearance.
Choosing the appropriate finish level is equally important. While a Level 4 finish may be suitable for many standard applications, Level 5 drywall finish can provide greater surface uniformity in areas with critical lighting or demanding decorative finishes.
Whether you are working on a residential renovation, new construction, or a large commercial project, professional drywall finishing services can help create the smooth and consistent surface your project requires.
Frequently Asked Questions
What is drywall finishing?
Drywall finishing is the process of taping drywall joints, applying joint compound, covering fasteners, sanding, and preparing the surface for painting or other decorative finishes.
What is the difference between drywall installation and finishing?
Drywall installation involves measuring, cutting, and attaching drywall panels to the framing. Drywall finishing focuses on concealing joints, fasteners, corners, and surface imperfections to create a finished surface.
What is a Level 5 drywall finish?
A Level 5 drywall finish includes a thin skim coat over the entire drywall surface in addition to the normal joint treatment. It is designed to provide a more uniform appearance, particularly under critical lighting or with certain paint finishes.
Is Level 5 drywall better than Level 4?
Not necessarily for every project. Level 5 drywall provides a higher degree of surface uniformity, but Level 4 may be appropriate for many standard interior applications. The right choice depends on lighting, paint, design, and project requirements.
How long does drywall finishing take?
The time required depends on the size of the project, number of coats, drying conditions, finish level, and complexity of the walls and ceilings.
Why does drywall need sanding?
Drywall sanding helps remove ridges, tool marks, and surface irregularities after the joint compound has dried, creating a smoother surface for primer and paint.
Can drywall finishing be used for commercial projects?
Yes. Commercial drywall finishing is widely used for offices, retail spaces, healthcare facilities, educational buildings, multi-unit properties, and other commercial interiors. CONTACT US